Antique Doll Dresses

Reproduction Clothes for Antique Dolls

  • Home
  • Shop
  • Learn
    • Sewing for Antique and Vintage Dolls
    • How to Sew Doll Dresses
    • Doll Repair, Restoration Seminars
    • How Measure Your Doll
    • Antique Doll Dress Styles
    • Hard Plastic Dolls from the 1950’s Clothes Information
    • Cissy Doll Dresses – What You Need To Know
    • Ideal Toni Doll Dresses Still in Demand
      • The Ideal Toni Doll: A Favorite Then and Now
      • Has your Ideal Toni Doll come undone?
    • Queen Anne Wooden Dolls
  • FAQs
  • Seminars
  • About Me
    • About Custom Doll Dresses

The Perfect Pleater-A Must Have For Heirloom Quality Doll Dresses

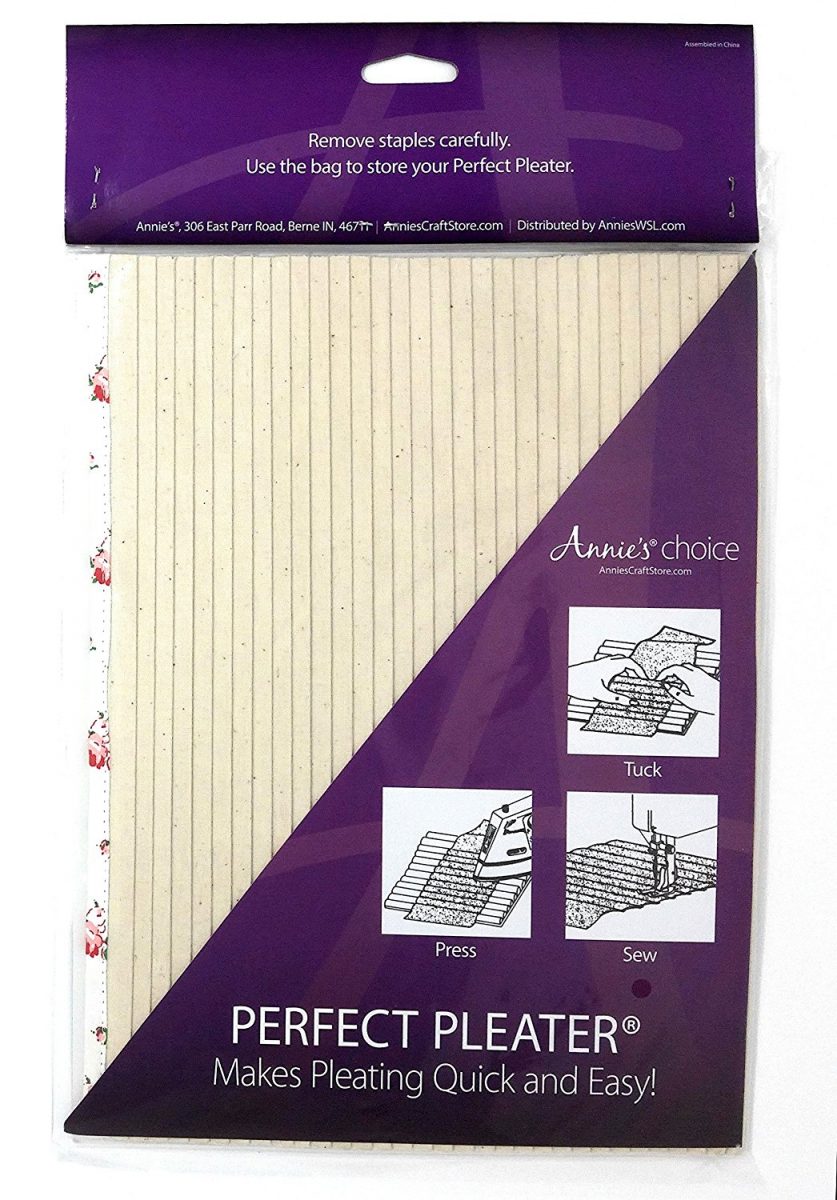
Another item I have been using since it was first offered for sale about 30 years ago– I own all sizes, and have worn out several. Pleats add a special touch to your heirloom quality dresses and have never gone out of style.   I use the pleater to pleat skirts, but also bodice fronts, sleeves, and anything else that needs pleats. If you click here you will find a wonderful demo of how to use the pleater and some ideas for some of the many things it is useful for.

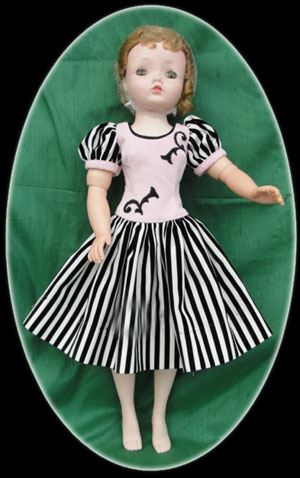
The only thing I might do a little differently than the video is that when I have the pleats pressed in, I take the piece to the sewing machine and sew a double row of long basting stitches across the top edge. By pulling these threads evenly, you can adjust the fit of the pleats to the bodice, or other piece they are to be attached to, and have a little fuller skirt or whatever. You don’t pull them enough to actually gather– just enough to snug them in to give a more relaxed fit with a little flair to the pleats, not so stiff looking. Click here to see an example of the pleats being a little fuller. To do pleats on a bodice, you cut a piece of fabric twice as wide as the bodice, and pleat it , press the pleats in place and stitch across the top and bottom to anchor them, then cut out the pleated bodice. Once the bodice is cut out, stitch across the shoulder seam and bottom of the bodice to anchor in place before proceeding, so it will look like this (click here) .

If you still have questions about how to do this, please feel free to ask  . Your question will be answered here, you will not receive unwanted emails! We do not spam our readers.

a Most Important Tool I Could Not Work Without-Tracing Paper

Great tracing paper! Great tracing paper has to be sturdy enough to pin without tearing, to use over and over, yet you must be able to see through it easily for tracing patterns. It also needs to be wide enough ( for me) to cut or trace patterns for even long skirts for dolls, or big circle skirts for dolls. It also has to be handy– on a roll, not in sheets or a tablet — so I can reel out just what  need, and either use right off the roll, or cut a piece the size I want to work with. I seldom have any use for commercial patterns, but when I do, I never cut them– I trace them  so they are ready to use in tissue form that won’t easily tear when I am working with it. Many of the great old doll dress patterns you buy on eBay and such are photo copies of the old patterns and are not on tissue. By tracing them off in stead of cutting them,  you not only have a pattern that is much easier to use, you have the original intact in case you need it again– or want to resell it. 

I of course make most of my own patterns, which is why I need the large roll of white tracing paper…. I use it to make all my patterns. It is soft and easy to fit on the dolls, but is also sturdy enough and crisp enough to be easy to work with. It is ideal if you want to alter a pattern, too– making it a little larger or smaller for a better fit on a doll.

The tracing paper shown here is the kind I use. I wanted to be sure and have it on the blog, because I will soon be offering more patterns you may want to use, and if you do, I recommend that you trace them off. This tracing paper comes in several sizes so you don’t have to buy the size I do–the 50 yard roll. You can also get it in much smaller amounts. Click on the picture or here to see where to buy at a great price!

The craft stores sell 5″ x 7″ ziplock clear plastic bags that are just the right size and shape to easily store and access your traced patterns. With a heavy felt pen you can write what it is right on the bag. These are perfect and will lie almost flat in a small drawer.

Feel free to ask questions or make comments— you will NOT recieve any emails! Replies will be made only on this blog. We never spam our customers. Your info will not be made public.


Tweezers– Another Absolute Essential for Sewing Doll Clothes

Click picture to  enlarge

When sewing doll clothes, you can be dealing with very small pieces– for example the sleeve for a Patsyette may be only 1 1/4″ by 2 1/2″.  The sleeve has to be sewn into the curved sleeve opening on a dress bodice that is around 3″ wide over all– so that curved opening is hard to grasp and guide under the needle with your fingers.

Even sewing the sides of the bodice, where you want to guide it to a 1/4″ seam, can be difficult to grasp with your fingers and guide under the presser foot. Tweezers are the answer. I have both curved and straight heavy duty tweezers near each of my machines, two regular sewing machines, the sergers, and the machine used for ruffling lace. They are excellent for guiding narrow lace through the ruffler too.

Acommpanying this text is picture is of the tweezers I use, one picture the serger, the other my main machine.  If you have ever struggled to guide a little piece of cloth beneath a wide sewing machine foot, you will love having the tweezers. Here is a link to the heavy duty type, in the handy 6″ size, at a good price! And I also have the larger size, the 8″, which come in handy when I need more reach to grasp something, click here

And here is a link to a nice sized curved tweezer that even in titled, “sewing machine tweezers”  just click here

I hope you enjoy having the tweezers to ease you guiding the little bodices, sleeves, lace and trims as you sew.

leave questions or comments below. YOU WILL NOT BE SPAMMED WITH EMAILS! We hate sites that do that. If we answer questions or comments, it will be posted here on the blog only!

1


Important Machine for Beautiful Doll Dresses

I hope you are not bored with the machines I describe. Without the serger with the tiny rolled hem, I would simply have to spend so much more time finishing dresses and underwear that I would have to add to the price.

I have my sergers set on the rolled hem and leave them there– for doll dresses, I never need them for anything else. I do have two of them — one has white thread always, the other I change threads on occasionally when doing dark colored clothing that the white doesn’t work well on. If I am not putting on matching thread, this serger always has off-white.

I bought the Janome serger only for the rolled hem—and it was the easiest to thread and use of all I tried, plus– the price as you can see is very reasonable. Before you buy any serger, I highly recommend  you first go to s sewing machine store that offers many brands, and try several hands on. Take with a  couple of pieces of light weight cotton to try it on. I specifically recommend this one. Read the reviews as well before you decide.

I am adding this serger as a suggestion today because I will soon be putting some things on the blog that have instructions to do some finishing with the tiny rolled hem on the serger, and want you to know what I am talking about when I mention it. The picture with this text shows the tinish on a small doll teddy. This is for a 9″ doll, and any other kind of finish would be difficult and probably bulky ( like adding lace or just a folded hem.) I know this for a fact because for more than 50 years I was left with no choice but to do it the hard way! If you will click on the picture to enlarge it you can see the neat little finish.

I also use this same serger with the rolled hem stitch to finish inside seams on the dresses.

A friend who makes reproduction dolls ( and therefore reproduction clothes) said of this finish, “but that is not authentic ( meaning it was not the way an original would have been done) so how can it be heirloom?” Here is your answer: heirloom sewing is NOT the same things as exact reproductions of antique items. Heirloom doll clothes are clothes that are expertly sewn and finished beautifully. As a matter of factual interest— much of the  underwear on antique dolls was NOT beautifully finished, in fact it was often left with unfinished raw edges. Would you really want to buy– or sell for that matter– garments cut out and left with raw edges?  What if you told your customers, “but this is AUTHENTIC, exactly like the factory ones were!  Do you think they would then want the underwear ( or even dress) with unfinished raw edges?  What we strive for here are dresses that look like the pictures of beautiful dolls new in the box— not dresses that replicate the unfinished underwear or  visible sewn hem.

I am happy to answer any questions you may have. You will NOT receive emails, all comments or questions will be answered right her on the blog.


More Dolls’ Clothes Research

Collector’s Book of Dolls’ Clothes: Costumes in Miniature, 1700-1929

This book (the title is a link to where you can buy) is another must have if you are going to sew heirloom doll clothes. It has more than just pictures of the clothes, it has different  kinds of information about the dolls and how they were dressed in the time period of the title, 1700-1929. Dorothy Coleman is one of the worlds experts on dolls and has put together many books to leave for future generations to become  educated about them.

While this book is somewhat more expensive than some I recommend, it is also  such a wealth of information that to get the same thing you would have to buy several other books– and I doubt if even then you could get all the information Ms.Coleman put together here. If you want a book to use, not for show, then don’t hesitate to buy a used copy and save some money.

If you are sewing clothes for old dolls, this is an absolute must have book for your shelf. Like most encyclopedias full of information, it is a large heavy book. The book was first published in 1975, and the original price was high– I think I paid close to $100 for it when I bought it, but I knew that she had done all the research that would take me an equal number of years to do– or more. I was happy to pay her for her work. Remember, we did not have the internet then!  But even with the internet, it would take a long time to find on your won all the information that is consolidated in this book.

Feel free to post questions or comments!

Another Great Research Resource Especially for Composition Dolls

Collectible Dolls and Accessories  of the Twenties and Thirties from Sears, Roebuck and Co. Catalog

If you are just getting into dressing old dolls and want to do it right,  this reprint of dolls from the catalogs of the era is a super resource. While most of the illustrations are drawings, the descriptions give lots of information on what materials are used and what accessories the dolls might have come with. There are some name brand dolls ( such as Shirley Temple-Ideal) but also  many “catalog dolls”. The catalogs of the era liked to buy unmarked dolls ( and sometimes even marked) and give them their own unique catalog name such as  “Sunshine” . Doll makers such as Effanbee, Ideal, Horseman sold dolls in the department stores like Sears and Monygomery Ward, but this book is from the Sears catalogs. It has dolls such as Tickle Toes, Patsy Family, and others. You may be able to find the identity of your unmarked doll here, or you may find one with the same style and description and year it was sold, to help you know what the original clothes looked like.

There are dexcriptions of unnamed dolls that may fit the “mystery doll” you are trying to dress– such as a celluloid or metal head doll. The pictures and descriptions can help you figure out when your doll was made, and how it came dressed, so you can dress it in appropriate heirloom quality clothes.

I love the description of the fabrics and styles of the clothing! It is like a journey back in time— when the Christmas catalogs would come, and my sisters and I would sit down and look at them for hours,  dreaming of what we might find under the tree. If you want to make beautiful, authentic doll dresses for dolls of this era, you will love it too. When I did doll clothes sewing seminars, this was one of the books I gave to the students.


How Should My Antique Doll be Dressed?

To do Heirloom quality doll clothes, the first thing you need to know is how your doll should be dressed for her era.  There are many books to help you understand the different fashion periods.

There are basically two kinds of dolls to dress: lady dolls ( fashion dolls) and child dolls, which can mean anything from newborn to pre-teen. Remember that dolls at any given period in time were dressed in the fashions of their time, whether the dolls represented children ( of any age) or adults.

It is interesting to note that the earliest “infant dolls” did not look like infants; they were simply dressed as infants and put in cradles or cribs. Today dolls representing infants LOOK like infants– and this trend began with the Bye-Lo baby doll. This doll was by Grace Storey Putnam, and was the first doll truly looking like an infant. Grace Storey Putnam  was a sculptor born in 1877 who had to support herself and her family after a divorce in the  1920s. She sculpted the doll while actually looking at a three day old baby. This at the time was revolutionary–It  had not been done before, but was the beginning of dolls that looked like real babies, that are still popular today– although the soft materials of today’s dolls make far more realistic babies than the porcelain, composition. paper mache, celluloid and other hard materials of Putnam’s times.

Here is an example of a very old doll dressed as an infant, but the doll does not look like a baby. You will often find these dolls dressed even as “ladies” when people find them stripped of original clothing, because they do not “look like babies”. This is why research is so important if you want to do heirloom quality doll dresses.

To get back to the fashions— whether infants, children or ladies–the dresses on your heirloom antique dolls should be authentic to the times of their introduction and manufacture. Research today is easy– we have the internet. If you are seriously costuming dolls, though, there are books you should have at your fingertips.

For an overview of  the fashions of the different time periods, I have never found a book that is better than one called the Evolution of Fashion. This wonderful book not only shows drawings of the fashions, but shows the shapes of the pattern pieces to make them, and information –very important– on the fabrics used as well as what was worn from the skin out. The book  can be expensive but you can still find bargains on it. Mine is soft cover which I find easier to use than hard cover, as well as it being less expensive.  Don’y hesitate to buy a good used one. Mine is extremely used, and it still is just fine!

Whether you are making dolls or dressing antique ones, you will find this book a necessity, it covers fashions from 1066– 1930. Enjoy!

Patterns for Doll Dresses

Pretty basic, right? You want to make a dress for Patsy and you look and find a pattern that is for Patsy, Shirley Temple and others— Oops! How can a pattern fit Patsy, who has a watermelon belly  and  bent arm, and a Shirley Temple doll, who has an entirely different shaped body? Truth is, the pattern doesn’t really fit well on either doll, unless you know how to make the adjustments to get a perfect fit on either one. As long as you realize this, you can buy these patterns, and carefully fit them to whichever doll you are making a dress for, before  you cut the fabric.

To fit a pattern, you cut out the bodice pattern pieces, front and back, and lay the bodice front piece on the front of the doll. Check to see if the neck opening is too large or too small, and if the width of the shoulder is correct. Check to see if the side seam will fall where it should in the center of the side under the arm. Check to see if the waist line on the pattern falls on the natural waist line of whichever doll you are sewing for. Make adjustments where needed.

Now pin the seam lines together at the side seam and shoulder seam– slip on the doll.See if the pattern will be too loose or too small anyplace, and adjust accordingly.

It is best to trace off the original pattern, and use your traced copy for adjustments, that way the original can be saved  for perhaps another doll.

On generic patterns, look for pattern that fit ONE SIZE DOLL, if you want a well fitting dress. If you buy a pattern that fits a 12 to 14″ doll, it will generally not really fit either one!  Two inches in a doll dress of that size is  like TWO SIZES  of person clothes. For example, if you go to the store you would never buy a dress that fits a size 12 or size 14″— if you are a size 12 you would certainly not look good in a dress that would fit a size 14!  So find patterns made for specific size dolls, for example a 14″ Toni doll.  A 14″ Toni dress is baggy on a 14″ Sweet Sue from the same era! And a 14″ Shirley Temple pattern or Patsy pattern would fit neither Sweet Sue or Toni of the same height.

Hope this makes your pattern buying easier and your dresses better fitting!

Feel free to leave questions or comments below, you will NOT be spammed with emails!


Loop Turner for Sewing

If you are doing a lot of doll clothes, you will wish you had this tool  over and over again if you don’t have one in your sewing room. It is another tool I put in the tool kit my students get. It is called a loop turner, but on doll clothes you will turn other things, things that would be big enough to easily turn in person size, but become impossible in doll size. Yep, If you have turned a little apron band, skirt strap or other such for a doll dress, and used the same old difficult and old fashioned saftey pin– after searching around for one the right size– you will fall in  love with this tool!  Use this tool to:

Turn spaghetti or skirt straps, button loops, frog closures, string belts and much more

Latch-hook end catches fabric to pull it through bias tubing

Made of wire, hooked end grabs and hangs on to fabric as you pull

You will love it.

I do find that one of these is adequate, I don’t turn that many tubes— but boy, when I need this, I REALLY need it! It is such a time-and-stress saver.

Leave questions or comments below. You will NOT be spammed or get a bunch of emails!


The Cording Foot

The cording foot is another tool I use a lot.
The Cording Foot allows you to attach thin cording, yarn, or ribbon neatly and precisely to sewing projects. Use a tricot stitch and decorative thread for a truly unique look.  The Janome type makes it possible to do one or more cords, but most of the cording feet  are for doing one at a time. Because the small trim is so wonderful for doll dresses, this foot is  a must have if you are sewing  a lot of dresses. If you have a different brand of machine, just run a search for “cording foot for (your machine).

I have used this foot in the past to put on strings of tiny beads. It gives a beautifully even trim. 

When sewing trim on, be sure to draw a line with your disappearing ink pen on the exact place you want to sew the cording or other decoration, so it lays exactly where you want it!  I used it to sew the cording at the top of the lace on this voile dress for Patsy Ann.

I will in a later post put on a video of  this foot in action!

Leave questions or comments below. You will NOT be spammed or get a bunch of emails!


A Bodkin— Do You Need One?

I didn’t have one for many, many years. Half a century or more. Who needs that? I can do it the old fashioned way to thread ribbon or elastic or something else— just use a safety pin. Then when I got into sewing for antique dolls, and started using a bunch of insert lace, I bought one. I used it the first time and thought, “how in the world did I ever get along without this?”

I had purchased the Dritz ballpoint bodkin and it works like a dream for threading the ribbons, wide or narrow, through the lace. It works well for threading elastic through a casing,  a draw string through a casing, and a bunch of other things. Now it goes into the tool pack I give to students. They mostly have had the attitude that I once did, “don’t need that”— until I demonstrate it in class. They see how easily it accomplishes things and are glad to have it. Opens up a whole new world to those who have never used one.

I will in a later post do a video demonstration of this one tool  Here are a couple of examples of the insert lace with the ribbon threaded through it, click here   where the insert lace is used on the bodice and at the waist, with the ribbon threaded through it, and here  where a wider lace is used around the waist only.

Leave questions or comments below. You will NOT be spammed or get a bunch of emails!


Measuring Tools

I know your sewing room is just full of all kinds of measuring tapes– retractables, two sided ones, cloth ones–even that cutting board  has 36″ measuring markings on the side of it. and of course the sewing guage. I have all these things too. My industrial ruffler has the measuring strip built right into the front– incredibly handy.

But there is one more tool I use the most, and nearly every day I am sewing. I have one by the ironing board, by each sewing machine and a couple on the cutting table because things can “get lost” there. ( Sound familiar?)


This great tool is  a clear plastic 12″ ruler.   I use them for measuring to press in hems,  measure sleeves, hats, the facing allowance,  the width the collar needs to be, and a whole bunch of other things. It is handy because I can see the edge of the fabric , any markings on the fabric or pattern, and a bunch of other things through it.  These I used to pick up at Office Depot and they are very inexpensive, but now like for many other things, I just look on line to buy. They do get kind of scratched up and marked up and sometimes lost. Or carried to another room to measure something and forgotten. I also have one 18″ clear plastic ruler, for the rare skirts for larger dolls that are a little wider.

I have only named a few of the things I use these rulers for! When I do a seminar, there is always one in the packet of tools I give to the student– I do this because I want to be sure when the student gets home, they will have the basics to work with.

In case you don’t have an Office Depot or are like me and love the convenience of shopping on line, click on the picture and you can get these  from Amazon!

Leave questions or comments below. You will NOT be spammed or get a bunch of emails!

Piping Presser Foot

Many of you will say “what the heck is a piping foot?” — for a couple of reasons. Number one, piping is not commonly used anymore. Number two, if people do use it, they usually just go buy some piping ( comes in a package like bias tape does). I use it quite a bit on heirloom quality doll dresses— but the commercially made  is too heavy and thick for most doll dresses, so I make my own. See a sample of piping on a dress here.  

Piping, if you are not familiar with it, is bias fabric folded over, ( similar to bias tape) encasing a cord or string. The size of the cord/string determines how heavy, light or delicate the piping is. I have a ball of plain white  cotton string that is just the right thickness for doll dress piping that I have used for years. You also have to use a lightweight fabric to cut your bias strips to avoid making it too bulky.

I usually use the piping on the waist line although it also makes a nice finish on the neck on a dress with a lined bodice as in the Cissy dress pictured here.I have usedpiping the same way to finish the bottom edges of straight sleeves. It can be a very effective and charming embellishment on your doll dresses.

In a later post I will have a video demonstrating this foot,  but in the picture above you can get an idea.

Leave questions or comments below. You will NOT be spammed or get a bunch of emails!

Blind Hemstitch Foot

Another attachment I couldn’t work without!  The blind hem in an heirloom quality dress is important to the appearance.  A hand stitched hem is nice, but there is no way anyone sewing for a living could take the time for that! The blind hem replaces it.

You may say, but all old doll dresses have regular machine-sewn hems! A blind hem would not be authentic! You have to remember, we are sewing heirloom quality, NOT exact copies of the old clothes! We want them to look the same at a glance, but be of top quality. The very finest antique dresses — pre-1900– may have had  hand sewn hems, but keep this in mind– once the sewing machine was in common use, no factory would pay women to sit around and sew clothing by hand. Most of the work was machine done! Things that could not be done by machine at the time–sewing on buttons or hooks, blind hems– were done by hand. As soon as machines and attachments were available to do so , it was done on the machine.

Our goal in sewing heirloom quality dresses is to make them beautiful, looking like the finest old ones, but with superb sewing.on dresses that will still be beautiful in 100 years.

The picture of the hemmer I have included is the one for MY machine– if you buy one, be sure you get the one for YOUR  machine, if you run a search you will easily find it.

In a later post I will be showing a video of how this foot is used and how easy it is!

Leave questions or comments below. You will NOT be spammed or get a bunch of emails!

Narrow Rolled Hem Presser Foot

This is another presser foot I use all the time. Most machines come with them– but if you don’t have one, you are missing out. I use this for anyplace I need a little 1/8″ rolled hem. All you experience sewers will say “Gee everybody has those” but more than half the students I have had take seminars have seen it but have no idea what it is for. In a later post I will do a video of using it. It quickly and efficiently will make a neat and tidy hem where you need one, in small enough scale for doll dresses. These have been around for machines for well over 100 years! The old machines often had the hemmer foot in  five or six sizes— for wider hems.

I wanted to put it on with a link to one with a reasonable price.Sewing machine shops tend to sell attachments at higher prices although many consider it a service to carry them and sell them reasonably. If you have to buy one be sure it is made for the type machine you have.

Do check the attachments that came with your machine! I have never bought a machine that didn’t include this basic tool, but if you bought a used machine it could be  missing.

Leave questions or comments below. You will NOT be spammed or get a bunch of emails!

More Sewing Machines to Use Making Doll Dresses

 This is the machine that I use my old fashioned ruffler on. The industrial ruffler I use for ruffling skirts is too heavy duty for ruffling fine lace and some fine fabrics, so I use an old fashioned ruffler attachment on this machine for those items. The ruffler attachments will work on newer machines, but not as well as they do on the old straight stitch machines. I got this machine at an estate sale, it didn’t work because the bobbin was in backward and it was threaded wrong. I  fixed those and it sews great, but since it is well over half a century old I had it all tuned. My machine guy said it will last longer that I will and beyond. Love this machine!

The rufflers made for domestic machines will do a fine job of ruffling your doll dresses. It just isn’t fast enough for me, doing it commercially, so I use the industrial one for that, and you will see a picture of it in another post. I had it made specially for my needs.

I will be talking about using the ruffler itself in a future post under tools of the trade.

Leave questions or comments below. You will NOT be spammed or get a bunch of emails!

Let’s Talk Sewing Machines

There is more to a sewing machine than just the one you have sitting there to do regular sewing on. Over the years making a living sewing doll clothes, I have routinely had at least four and usually more machines in my sewing room at any given time.

My main machines are all Janome, formerly and for more than a hundred years trade named New Home. I will never imply that this is the only good machine, it is just the brand that I find lasts without repair and does all the things I need it to do, so it is the one I stay with for my main machine and a couple of the others. I upgraded to the computer machines as soon as they came out. When sewing for a living, speed and accuracy are a complete necessity, so I have always had top of the line machines. This is not to say I get a new machine every year– only every few years, when they have new innovations that can save me time and work.

For making doll clothes, I am currently still happy with a machine (Janome Memory Craft 9000, top of the line for the year it was issued) because although like any seamstress I drool over each brand new machine, this machine does all I ever need it to do and much more. The 50 built in  stitches that I can access at the push of a button, plus all the important attachments I use,  do all I need for heirloom quality doll clothes.

I have a Memory Craft 7000 that still does a lot of the same things beautifully, that is my backup and secondary machine. I have a secondary machine because if I am sewing  for example a white dress with red trim— I put red thread on the secondary machine so I don’t have to keep changing threads. If my main machine needs servicing every five years or so  I use the secondary machine while it is in the shop.

I will talk of other types of machines in additional posts.  Feel free to leave questions below.


Button or Snap Foot for Your Machine

This foot is another that helps me cut the time on sewing so I can afford to sell dresses at the prices I do. I know a lot of people sell doll dresses for a few dollars on the internet and especially on eBay– and I am often asked  “why are your dresses so expensive?” The reason is the fine detail and expert work  and finishing as well as the top quality fabrics and embellishments. If I didn’t have all the tools to help cut the time required to make heirloom quality dresses, I would have to charge a great deal more for them.

This foot, used for sewing on snaps and little buttons is available for I think almost any sewing machine that does zig zag sewing with adjustable zig-zag width. Just be sure to buy it for your brand of machine.

In a later blog I will show a video of how to use this foot.

Leave questions or comments below. You will NOT be spammed or get a bunch of emails!

The Industrial Ruffling Machine

This machine allows me to make dresses and sell them at a reasonable price. Most of the doll skirts are gathered, or ruffled, at the waist, and sometimes rows of fabric make a tiered skirt . It is also efficient to gather yards of ruffles for bonnets, or on the bottom of skirts or petticoats. It takes about five times as long to ruffle by hand or on the small ruffler than it does on this. I can also set it so  if the waist is 8″, it will ruffle the skirt to that exact width! Or to the exact width of the bonnet, so all I have to do is sew the ruffle or skirt on.

In times to come on this blog, I will be showing videos of this machine, as well as the small ruffler on the regular machine, in action.  for now there is a still photo.

You can look at industrial machines and find rufflers, and you will then wonder why I say I had this specially made. That is because the regular ones are set for a certain depth of ruffle and it takes major adjustment to set it for anything else. I told the Industrial machine guy I needed one I could quickly and easily adjust, and he figure it out and made this special one for me.

Feel free to leave questions or comments!


Sewing Gauge

In every single sewing seminar I have done, I have given the students  a sewing gauge as part of the package they get. I have been amazed that NOT ONE  of them even knew  what I was talking about when I said, “get out your  gauge”!  They would look at the box of tools with a blank look until they spotted the name of the tool on the package.

I use the sewing gauge every day. I use it to mark hems, to mark where the trim goes on the bodice or skirt, to adjust a pattern, and so many other things there is not room to list them all. There will be some explicit instructions for use later. For now, just be sure you have one in your tool box by your machine! Dritz  is the kind I always buy, they are quality and inexpensive. Just click this link to find one  Dritz Sewing Gauge

Leave questions or comments below. You will NOT be spammed or get a bunch of emails!

Fraying Seams– Pinking Shears

When sewing heirloom quality doll clothes with fine fabrics it is not uncommon to use fabric that frays easily. I am sure you have a dozen bottles of “Fray check”  (fabric glue) sitting about your sewing room. I don’t have any.  A little dab of this on person clothes, with a half inch or 5/8″ seam, won’t show. On a bodice  for an average doll it will make a “big glob of glue.” This may be acceptable for play doll clothes, but it certainly is not for heirloom quality doll clothes.

“Oh” you may ask, ” how then do I avoid fraying at the seams?”   You don’t. You control it. First, while the correct width of seams for fine doll clothing is 1/4 inch, when cutting fabric that might fray easily, instead allow for 3/8″ seams. This gives you room to cut with pinking shears and still have your 1/4″ seam. The pinking shears greatly reduce fraying and the slightly wider seams take care of the zig-zag cut. Invest in fine quality, sharp pinking shears, don’t go cheap on these. I use Ghinger Pinking  shears because they are smaller and razor sharp— and they do come in both right hand and left hand styles. 

If with your pinked edges you still feel there might be a little fraying, don’t dump glue on it– use the triple stretch stitch on your machine. This takes a fraction longer but makes an edge that doesn’t fray easily.

Never used pinking shears and don’t know what they are? Pinking shears are special scissors that cut the fabric with a zig-zag edge, for the purpose of the above, helping to prevent fraying. These are NOT THE SAME as the scalloping shears or cheap pinking-type shears you buy in the scrap booking section of the craft store. You need real professional quality (as shown) pinking shears for doing fine sewing.

Leave questions or comments below. You will NOT be spammed or get a bunch of emails!

Sewing Machine Needles

Okay this too seems rather basic— but it is actually fairly important. In sewing doll clothes you will most likely ( at least you should be) be using fairly lightweight if not actually fine fabrics, as they make the best doll clothes.  (Remember, I don’t write about play doll clothes– just about sewing heirloom quality doll clothes.) I never use anything in my machines for doll clothes except  Schmetz Universal Needle —  Slight ball point in size 70/10 which is a fairly fine needle. This works well on everything from fine silk to felt or velvet, and all weights in between including organdy, silks, satins, batistes and other fine cottons. This doesn’t mean you can’t use your machine for other things without changing needles— I use these for mending, sewing chair pads, or whatever I am doing, but after using them for  heavier work, I will put in a new needle when going back to fine fabrics. If ever you are sewing and this needle pulls at the fabric or seems to make holes, it means the needle is dull and needs to be changed.

About Pin Cushions

Pin cushions seem like they are so basic they need not be mentioned, but they come in such a variety of sizes and shapes I thought I would mention them. After nearly three quarters of a century of sewing, I found the best, most efficient and least expensive to be the large “tomato” pin cushion. By large I mean the biggest– about 5″ across and 4.5″ tall. This pin cushion not only handles a bunch of pins, it is heavy enough so when you pull one out the pin cushion doesn’t lift with the pin. It should also have the small bag of emery with it to hold any needles you may be using and keep them sharp.

I have one of these by each sewing machine, on the cutting table, and near the ironing board, with pins so if I need to pin something I don’t have to find where they are, they are withing easy reach!

Leave questions or comments below. You will NOT be spammed or get a bunch of emails!

Straight Pins

Straight pins are an essential tool– even if you like to baste seams first to make sure they are right before sewing them– you need to pin the pieces neatly together before sewing. This makes it easy to see just where your seam needs to be. Anyone reading this has probably used straight pins for this, but there are straight pins of many different types and they do have different purposes. For sewing doll clothes, those cute pins with the color balls at the top are often the most appealing. And they are the most useless for sewing doll clothes. Whether going straight to the machine to sew the seams ( which is most common and what I do except in unusual cases) or basting first, you will find those cute colored head get in the way and you have to pull them out as you sew. If you use long and thin silk pins, which have a tiny head and are very sharp, you can just leave them in place and sew right over them, removing them when you are done. Since doll clothes are often made of fine fabrics like organdy, silk, batiste, taffeta and so on– silk pins are also the best for not damaging the fabrics.  Buy a package and try them– you will love them! It is the only kind I use.

Leave questions or comments below. You will NOT be spammed or get a bunch of emails!


  • 1
  • 2
  • Next Page »

In loving memory: JoAnn Morgan

Gone but not forgotten

We have disabled the shopping feature of this site until I can get Mom’s book “Through the Eyes of Gretchen” Published.

I am sorry for any inconvenience.

Harmony (daughter and webmaster)

Blog Menu

  • How to Sew Doll Dresses
  • Tools of the Trade
  • Seminars
  • Recommended Resources
  • Make this Doll Dress
  • Fabrics, Trims & Embellishments

You Can Repair and Restore Dolls As A Career!

[gallery link="file" columns="2" ids="21,23,20,22"]

Doll Repair & Restoration Seminars

Now offering  more than one kind of seminar - Call Rubie at 1-214-403-7077 to decide which seminar is best for your goals. Full seminar, antique dolls to modern, including china and bisque dolls, includes cloth, papier Mache, and other … Get Details!

Doll Repair & Restoration Seminars

Doll Repair and Restoration Seminars — not a hobby, a lifetime career!

Now offering  more than one kind of seminar - Call Rubie at 1-214-403-7077 to decide which seminar is best for your goals. Full seminar, antique dolls to modern, including china and bisque dolls, includes cloth, papier Mache, and other

Get The Details

Doll Repair – Stringing

Merry Christmas

About the Lace I Am Putting On….

Because of illness, I am liquidating  a 70 year accumulation of fabrics, trims and goodies in my sewing room. I am unable to sell by the yard as there is simply too much of it!  So all items will be … [Read More...]

Queen Anne Dolls

Since I am not actually in the doll business but am offering these for sale,  I feel I need to share the whole story with my customers. Many years ago I bought a collection of old dolls, and in the collection was a carved wooden Queen Anne doll from … More...

Frequently Asked Questions

Joann…I feel stupid but I can not tell the grain on material… You said it really matters that it is cut right.. If you get a chance explain to me how to tell.. I appreciate your time.. Looking forward to trying the patterns you just sent me but afraid

Hi Mary, sorry it is confusing for you.  Here is a picture of a bolt of fabric telling how to tell … [Read More...]

I have an antique doll by Lena Schwartz. How do I sell it?

I am sorry, I have been out of the doll business for almost 20 years and all the dealers I knew have … [Read More...]

What Makes a Doll Antique or Vintage

Before eBay set their own ideas for what is antique or vintage, a doll to be considered vintage had … [Read More...]

More Posts from this Category

Privacy Notice · Terms of Use · Contact Us · Copyright © 2025 · Base Website · Custom Web Design by Coburn Enterprises · Log in